Shopping in an online store for the first time is quite overwhelming. However, if you don’t get to your stuff within a few minutes, you’ll feel frustrated with the online store. In case of this situation, product tags and categories come in handy. Nowadays visitors take only 50 milliseconds to judge a website.
To overcome those obstacles, product tags came to the market to track the categorized products easily. Can you believe it? It’s even available in your WooCommerce store. To unlock those WooCommerce deals plugins and to know more about product tags, follow the steps outlined below.
Before getting started, make sure you have installed and activated the popular WooCommerce Discount plugin – Woo Discount Rules:
Table of contents
Ultimate Guide: Woocommerce Product Tags Discount
In this section, we are going to cover up the WooCommerce discount based on product tags elaborately. To make things easier for you, we’ll go through the fundamentals of WooCommerce product tags and how to build discount rules in detail.
Basics of Product Tags and How to Add Product Tags in WooCommerce
A product tag is a “Keyword” or “Key phrase” used to organize, identify & track the specific products from the depot. Choosing the right keyword is crucial while creating your product tags. As a result, it can help you optimize the products on your eCommerce website.
Adding such estimable tags in WooCommerce is not that hard to do. In the steps below, we’ll show you how to add product tags quickly and easily.
Step 1:
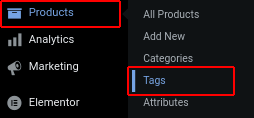
Login to your WordPress admin section. Go to the dashboard -> Click on “Products” -> “Tags”.
Step 2:
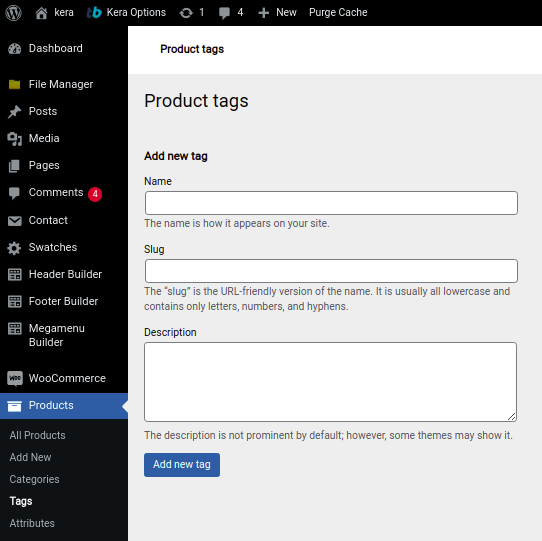
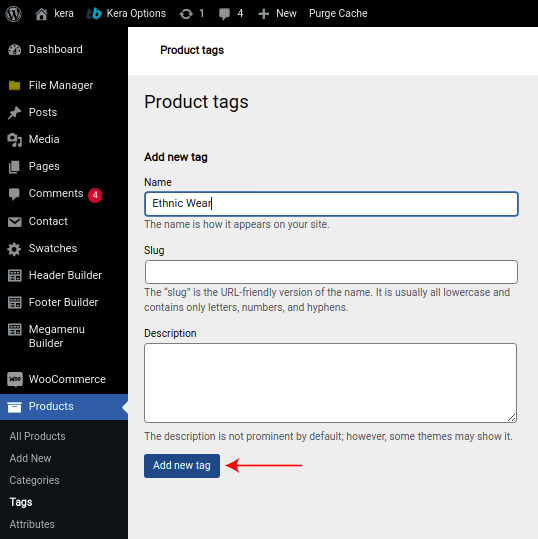
A product tags pop-up appears as illustrated.
Step 3:
Add your new Product Tags – Enter the name, slug (optional), and description (optional).
Click on “Add new tag” -> it’ll save and add the given tags to your Product tags list.
Now, you have successfully added your product tags to your online store. You can edit or remove or update your tags anytime. You can also apply a discount based on selected product tags in WooCommerce.
Do you want to know how it’s done?
Follow up the below process to know the overview of fixings discounts depending on specific product tags in WooCommerce.
How to set up WooCommerce discount based on product tags or taxonomies
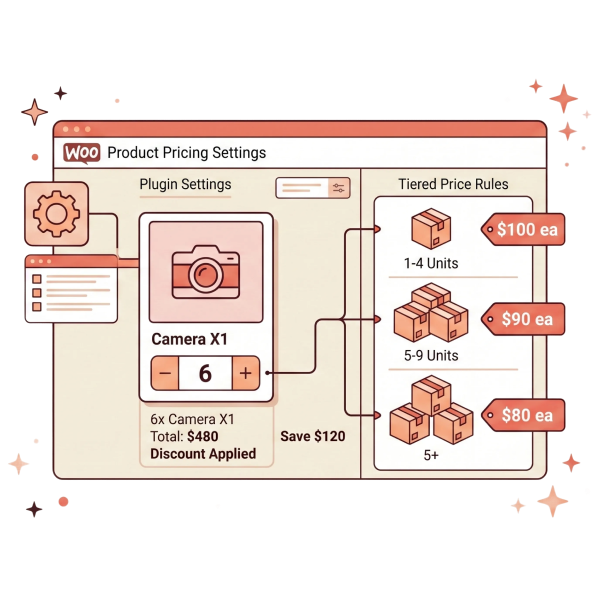
As a store owner, if you are looking to apply the discount to your products. It’ll take a lot of time to apply without the taxonomy. To implement the progress easily, product tags are used in the discount rule of WooCommerce. To apply the product-specific discount based on tags in WooCommerce precisely, follow the below discount rule procedure.
Initially, you need to install the ideal “WooCommerce Discount Rule Plugins”. You can also download this plugin directly from the WordPress repository to even use more tremendous features more efficiently. For the installation process to make things simpler for you, we’ve included some basic instructions below.
Install Discount Rules for WooCommerce
For downloading the plugin successfully, follow the below step procedure to install the Discount Rule plugin in your WooCommerce store.
Step 1:
Login to your WordPress admin area. Go to the dashboard -> Click on “Plugins”
Step 2:
Click on the “Add New” button as shown below

Step 3:
A pop-up of the “Upload Plugins” tab appears. In the search bar, enter the “Discount rules” as illustrated below.
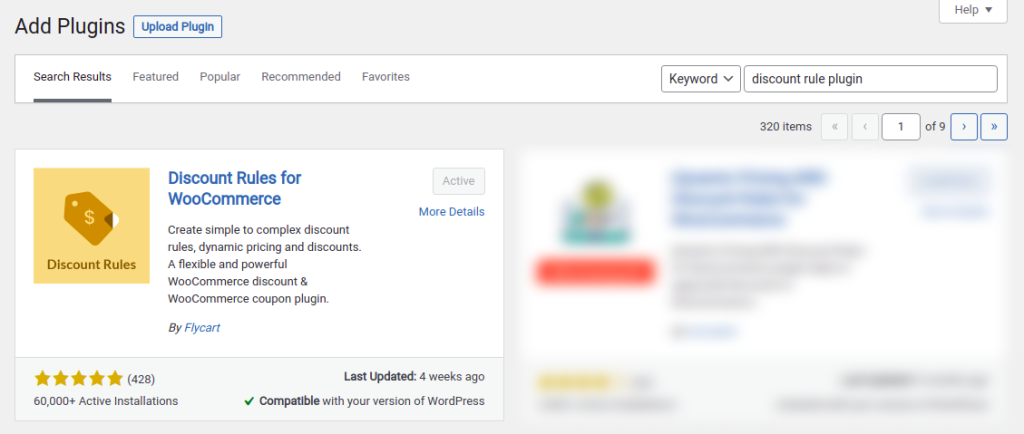
Click on the “Activate” to install and activate the Plugin of the basic version in WooCommerce.
Do you like to apply more surprising deals or discounts to your products?
Then you’ll need to upgrade to the WooCommerce PRO version of Discount Rules to get unlimited offers and discounts for your products.
Now that we have gone over the installation procedure, it’s time to set up your discount rule. To configure your discount rule proficiently, follow the steps below.
Configure WooCommerce Discount Rules
The WooCommerce Discount Rules can be configured as stated below. This procedure must be followed in order to get automatic updates and support for your plugin.
Step 1:
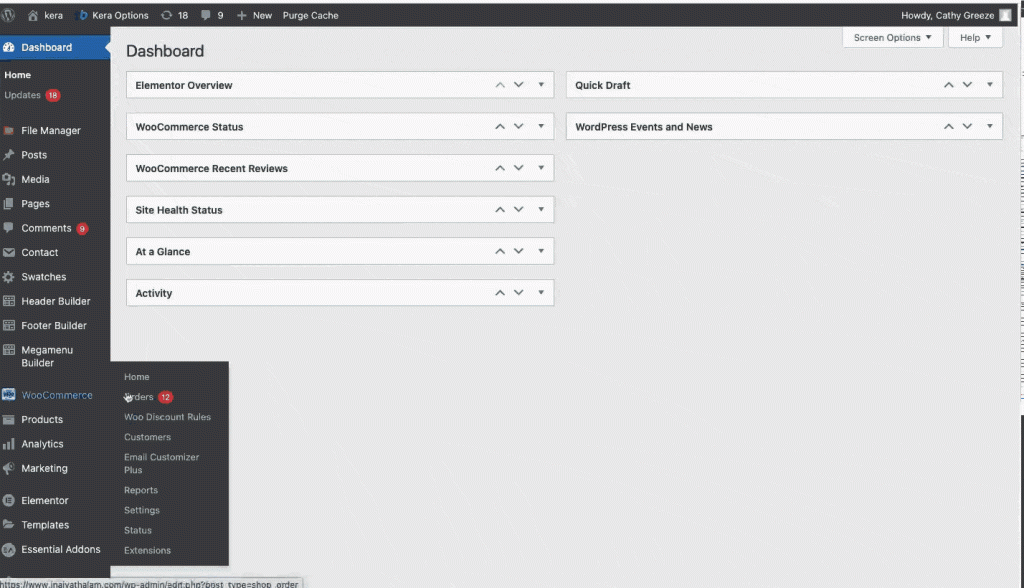
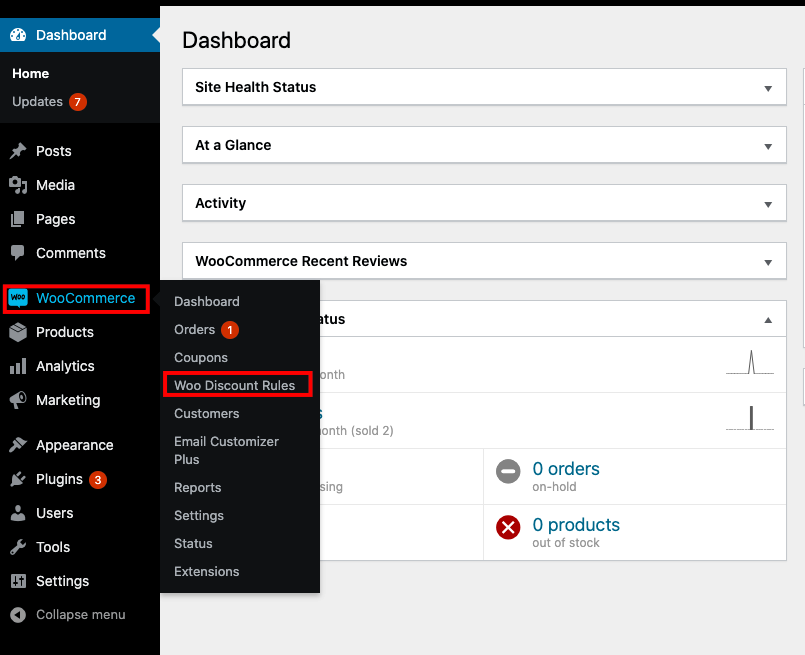
Login to your WordPress admin section. Go to the dashboard -> Click on the “WooCommerce”
Step 2:
From the listed option of WooCommerce – Click on the “Woo Discount Rules”
Step 3:
Basic Configuration – Get your license key from the Flycart’s download page. Enter the License Key as pictured and click on the “validate” button to activate.
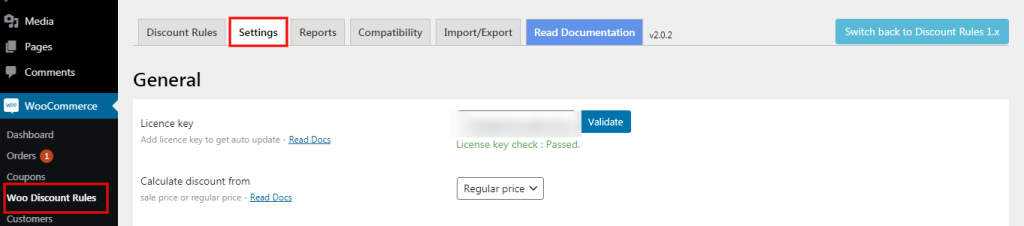
You have successfully validated your license key.
Finally, we have completed the installation and configuration phases of the discount rule. Let’s look at how to use product tags to add multiple discounts. Follow the steps outlined below to get started.
Apply product tags based WooCommerce dynamic pricing
To make product tags based WooCommerce dynamic pricing more understandable, We have shown simple steps below with an example.
Let’s begin with how to get a 30% discount on a product having specific tags. You may also see how the price changes depending on the discount we apply. Let me show you the step-by-step guide to apply the discount using product tags.
Step 1:
Login to your WordPress admin section. Go to the dashboard -> Click on the “WooCommerce” -> “Woo Discount Rules”
Step 2:
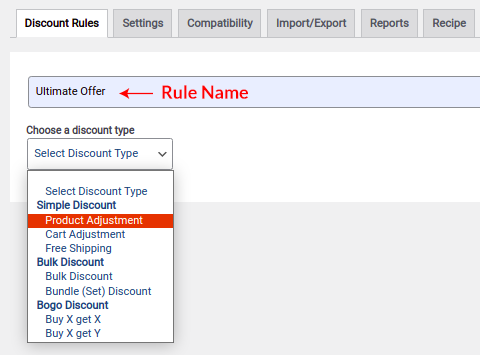
A tab of Discount Rule will appear. Click on “Add New Rule”

Step 3:
Enter the “Rule Name” and choose the discount type -> Product Adjustment
Step 4:
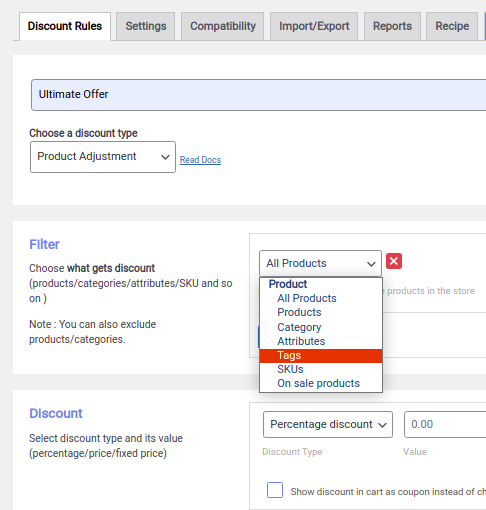
In the Filter – From the listed option of “what gets discount” -> Click on the “tags”
Step 5:
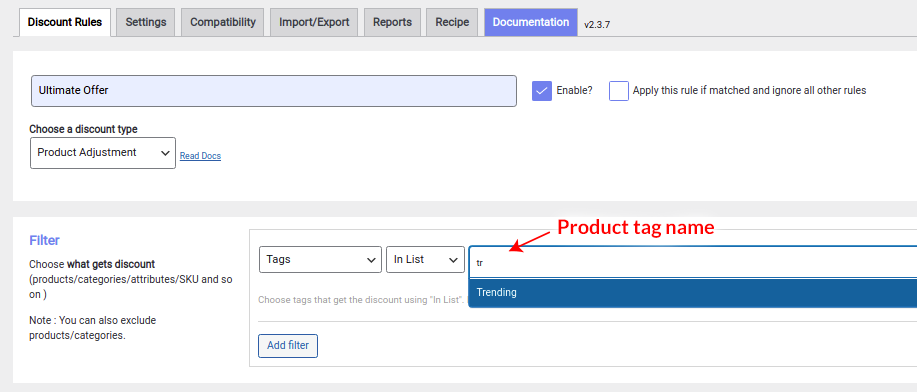
In the search bar of tags – Enter the product tag name that gets the discount.
Step 6:
Discount – Choose the discount type -> Percentage Discount and set the value.
You can also enter the text manually for discounts & offers. Make it visible by check-in the box of the show discount option as depicted below.

Step 7:
Save the rule and go to your WooCommercestore. Look in the product tags that we provided the discount. Add any product from the tags to the cart and see the price variation on the checkout page.
Here’s an example to make you understand how discounts based on product tags will look like.
For instance:
Here we have applied the discount to the product tags of “trending” – 30% OFF.
To give you a clear understanding of product tags. We’ll show you a side-by-side comparison of two different tags. One with the discount and another without the discount. See the variation of the dynamic price when we add those products to the cart.
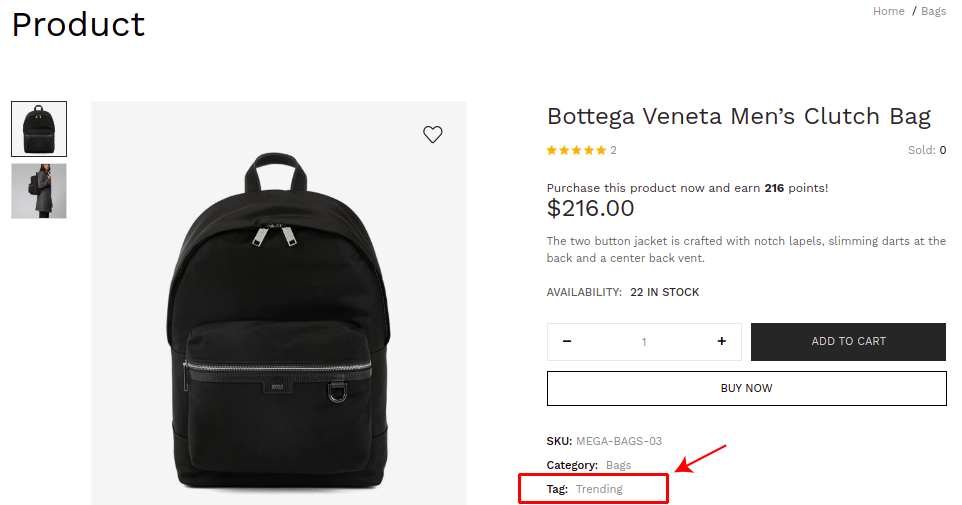
1. In Product tags of “trending”, we have added “Bottega Veneta Men’s Clutch Bag” to the cart. On this product tag, we have applied a 30% discount.
Go to your shopping cart -> Click on the “view cart” to see the discount applied to your selected product.
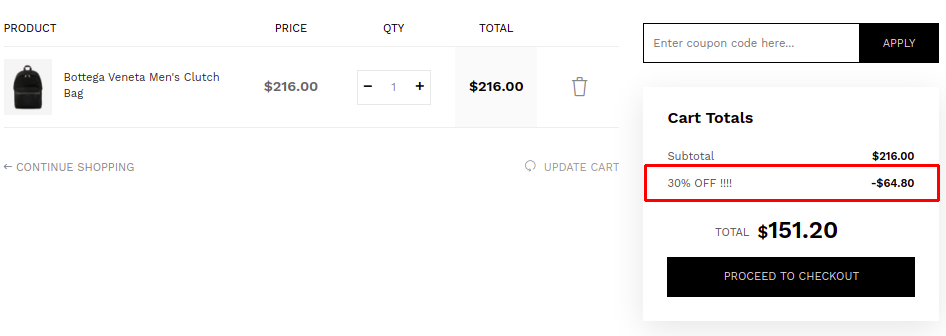
You can view the price variation in the cart total. 30% OFF!!!! – Discount is applied as we created for the “trending” WooCommerce product tags.
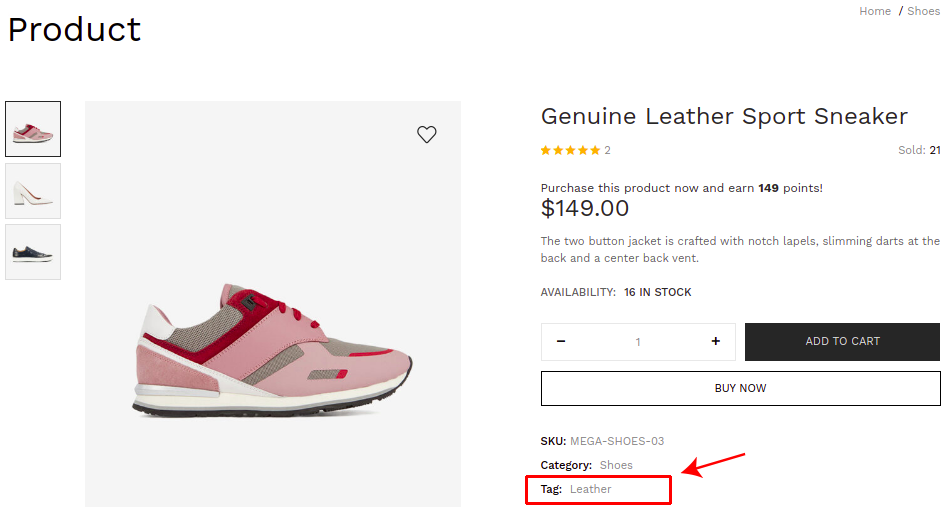
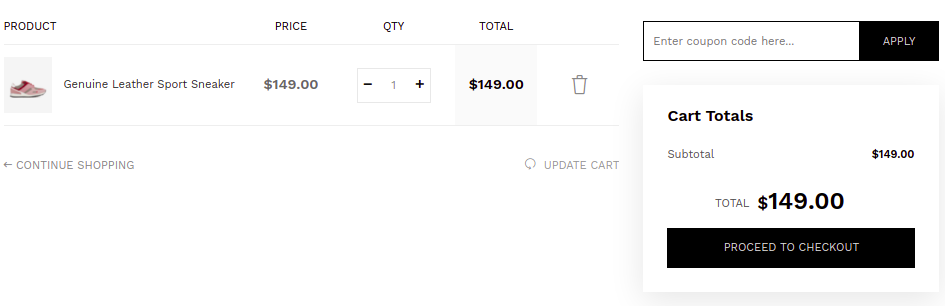
2. Here, we’ll check a different Product tag “Leather”. We have also added “Genuine Leather Sport Sneaker” to the cart. There’s no discount applied to this product tag.
Go to your shopping cart -> Click on the “view cart”. You can view the product price remains the same since there are no discount rules created for this product tag.
Wrapping Up
Likewise, you can apply the bulk discount to the product tags of multiple products at once in your WooCommerce store. You can also set the different conditional rules for the discount of cart items – Product Tags in WooCommerce. The main purpose of product tags is to make shopping easier.
Let us consider if there are popular products in the market and they are from different categories. Do you want to bind all the popular products into one place to apply the discount easily? It’s quite simple: you can create a product tag named after “Popular”. It will be easy to group the product in the way you want. With the help of product tags, it’ll be easier to offer deals quickly. You can apply the discount on the well-known tags in the online store or with the existing one to boost your sale.
Thus make use of WooCommerce discount rule plugins to set up the discount based on tags and grow your sales smartly.