To display discount percentage on WooCommerce sale badges, you need a smart plugin, “Discount Rules for WooCommerce – Pro.” It helps you customize badges based on your brand and easily capture customers’ attention.
Boost your WooCommerce sales and conversions by displaying discount percentages on your sale badges.
A clear and enticing discount can significantly impact customer purchasing decisions. This guide will walk you through the steps to effectively implement this feature on your online store.
You enhance product visibility and build trust with your customers by showcasing the exact discount percentage.
A well-optimized sale badge can dramatically improve your click-through rates and drive more sales. Whether you’re a seasoned WooCommerce user or just starting out, this tutorial will provide you with the necessary knowledge and code snippets to achieve your desired outcome.
Get ready to take your WooCommerce store to the next level and maximize your sales potential with this simple yet effective strategy. Let’s dive in!
Display Discount Percentage On Sale Badges Using the Discount Rules Pro Plugin and Enhance Customer Experience.
Table of contents
- What is a WooCommerce Sale Badge?
- Benefits Of Displaying A Sale Badge Percentage In WooCommerce
- How To Add A Sale Badge In WooCommerce?
- How To Display Woocommerce Discount Percentage On The Sale Badge?
- Best Practices For Displaying The Discount Percentage On The Woocommerce Sale Badge
- Conclusion
- Frequently Asked Question
What is a WooCommerce Sale Badge?
It’s typically a small graphic or text overlay placed on a product image to inform customers about a discounted price quickly.
Common elements include the word “Sale,” a percentage off, or a specific price reduction. These badges are essential marketing tools as they draw attention to discounted items, create a sense of urgency, and encourage impulse purchases. Online stores can significantly boost conversions and overall sales by effectively displaying discount percentages on sale badges.
Here’s an example of a WooCommerce Sale Badge:
A bright red badge in the top right corner of a product image with the text “20% OFF” clearly displays a current sale on that item.
Benefits Of Displaying A Sale Badge Percentage In WooCommerce
Displaying the discount percentage on the sale badge in WooCommerce can be highly beneficial for customers and store owners. Here are several reasons why this tactic is advantageous:
1. Increased Customer Attraction
A percentage discount is visually striking and can quickly catch the customer’s eye, drawing attention to the discounted products.
2. Enhanced Decision-Making
Displaying the discount percentage clearly reveals how much a customer is saving, making it easier for them to make purchasing decisions.
3. Boost in Sales
A visible discount percentage can create a sense of urgency, prompting customers to buy now rather than wait. This can lead to increased impulse purchases & grow your sales rate.
4. Competitive Advantage
In a competitive market, clear discount information can set your store apart from others that do not provide such details, attracting more customers to your site.
5. Marketing and Promotion
Discount percentages can be used effectively in marketing campaigns, both on-site and through external channels like social media, emails, and advertisements, to attract traffic and increase sales.
6. Transparency and Trust
Transparency in pricing, including clear discount information, can build trust with customers, as they feel they are getting a fair deal and that the store is honest about its pricing strategies.
Sale Badge Implementation Tips
By displaying the discount percentage on sale badges, WooCommerce store owners can create a more attractive, transparent, and effective shopping experience, leading to increased customer engagement and sales.
Here are some tips to make the sale badge percentages effective:
- Consistent Design: To maintain a cohesive user experience, ensure the sale badge design is consistent with your store’s overall look and feel.
- Visibility: Place the sale badge in a prominent position on the product image to ensure it is easily noticed.
- Automation: Utilize WooCommerce plugins or custom code to automate the calculation and display of discount percentages, reducing manual effort and ensuring accuracy.
Automate discount percentages on sale badges using the Discount Rules Pro plugin to simplify your efforts and increase sales.
How To Add A Sale Badge In WooCommerce?
Adding a basic “sale“ badge on WooCommerce products is simply achieved with the default settings.
To add a sale badge in WooCommerce:
- Log in to your WordPress Dashboard.
- Navigate to WooCommerce -> Products -> “All Products”.
- Choose the product you wish to promote with a sale badge. You can also add a new product.
- Scroll down to the “Product Data” section. In the “General” tab, enter the regular and discounted sale prices.
- Save your changes.
After completing these steps, your product will feature a basic “Sale!” Badge.
It’s time to make this simple “Sale!” badge attractive by displaying the product’s discount percentage.
How To Display Woocommerce Discount Percentage On The Sale Badge?
To enhance your WooCommerce product pages and showcase the discount percentage on the sale badge, follow these steps using the “Discount Rules for WooCommerce -Pro” plugin:
Install and activate the free version of the “Discount Rules for WooCommerce” plugin.
To display a discount percentage on the WooCommerce sale badge:
- Navigate to WordPress Dashboard -> WooCommerce -> “Discount Rules” -> “Settings”.
- Scroll down to the “Product” tab and locate the “On-Sale Badge” option.
- Choose “Show on products covered under any discount rule”.
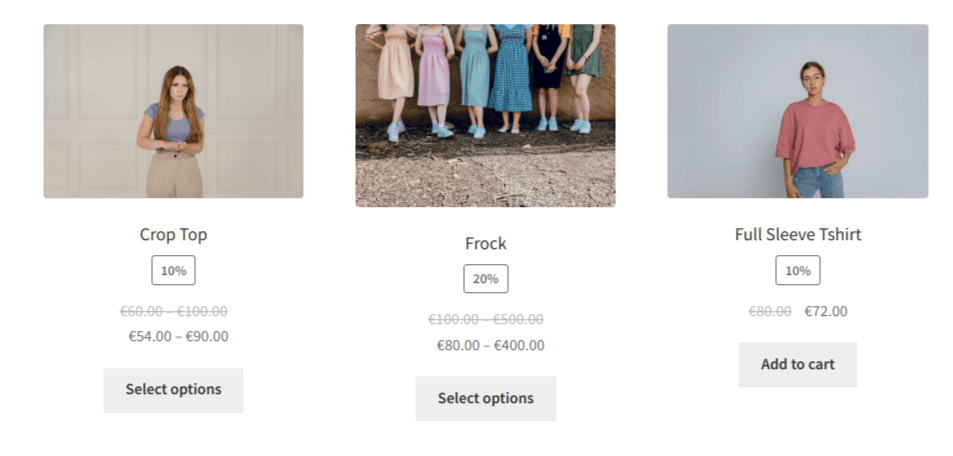
- Enable the “Display the percentage in the sale badge” option in the “Customize sale badge.”
- Now, edit the percentage value in the “Sale badge content”.
- Save Changes.
Now, the Sale Badge will not only display badges but also display the discount percentage.
Related Read:
How to Create WooCommerce Percentage Discounts?
Best Practices For Displaying The Discount Percentage On The Woocommerce Sale Badge
When displaying discount percentages on WooCommerce sale badges, you want to ensure clarity and effectiveness in communicating the value to your customers.
Here are some best practices to consider:
- Visibility and Readability: The discount percentage should be clearly visible and accessible, even at a glance. Use a visible font size and style.
- Positioning: The discount percentage should be prominently displayed on the badge, typically near the top or center. Avoid placing it where other elements might obscure it.
- Color Contrast: Use colors that contrast nicely with the badge background to make the percentage stand out. For example, if the badge background is red, the percentage’s white or yellow font can be highly visible.
- Consistency: Maintain a consistent style for displaying discount percentages across your website. This will help establish familiarity and make it easier for customers to understand.
- Use Symbols: Consider using symbols like “%” or “Off” alongside the percentage to make it clear that it represents a discount.
- Avoid Clutter: Don’t overcrowd the badge with too much information. The discount percentage should be the focal point, so avoid adding unnecessary text or graphics that might distract from it.
- Mobile-Friendly: Ensure the discount percentage is still visible on smaller screens like mobile devices. Test how it appears on various screen sizes to ensure a good user experience.
- Test Different Designs: Conduct A/B testing with different badge designs to see which one resonates better with your audience in terms of visibility and understanding of the discount percentage.
By following these best practices, you can effectively display discount percentages on WooCommerce sale badges, making it easier for customers to recognize and take advantage of the deals you offer.
Show discount percentages on sale badges with Discount Rules Pro to boost sales.
Conclusion
Displaying the Discount percentage on the sale badge is a simple but powerful way to attract your customers and increase sales in our online store. With this strategy, you can give your customers a smooth and easy shopping experience.
In addition, if you’re consistently displaying the discount percentage, your customers will build trust with your WooCommerce store over time.
To easily add the discount percentage on the sale badge, you can use the free version of the “Discount Rules for WooCommerce” plugin. The plugin helps you display discount percentages with a few easy steps.
Related Reads:
- How to change the sales badge text in WooCommerce?
- How to Strike the Original Price Over the Discount Price in WooCommerce?
- How to add discounts in WooCommerce?
Frequently Asked Question
The position of the sale badge in WooCommerce depends on the theme you’re using. It can be anywhere around the product.
You can discount a price in WooCommerce in two ways:
1. Change Product Price:
Navigate to the Products page and edit the product you want to offer a discount. Add the “sale price” and the “regular product price.”
2. Use “Discount Rules Pro” WooCommerce Plugin:
Install the plugin and add a new discount rule. Choose discount type, filter products, set discount value, and optionally apply conditions.
You can apply an automatic discount in WooCommerce by installing the “Discount Rules for WooCommerce -Pro” plugin.
1. After installing it, add a new discount rule.
2. Select the discount type from the different types available based on your campaign.
3. Filter specific products or categories.
4. Choose the discount type and its value.
5. Optionally, set purchase conditions to your discount offer, and save changes.
To add a discount coupon in WordPress/ WooCommerce, you can use two methods:
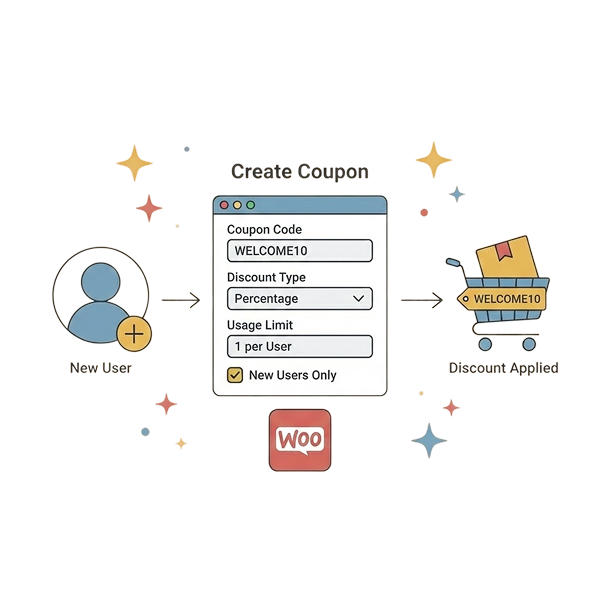
1. Default WooCommerce Coupon: Go to the “Marketing” section of the WooCommerce. Click “Add Coupon” and create your coupon code to provide a discount coupon in your store.
2. Use the “Discount Rules Pro” Plugin: Go to “WooCommerce -> Discount Rules” to add a new discount rule, filter products, set the discount type, and choose the “Coupon” condition in the rules section to add a discount coupon to products.